[Best effort] Installing GEOS on Windows machines using Docker
In this section, we will install GEOS on a Windows machine using a Docker container with a precompiled version of
GEOS’s third party libraries (TPL). These steps are an adaptation of ref:UsingDocker for the Windows environment.
In the following sections, we will be using Ubuntu based image as an example.
1. Install Docker Desktop
On your Windows machine, follow these steps.
Download the most recent installer for Docker Desktop. Before installation please check the current status of Windows
Subsystem for Linux ( WSL ) on your machine as Docker will use WSL2 as a backend.
To do that, open a PowerShell(Admin)
PS > wsl --install
PS > wsl --status
PS > wsl --set-default-version 2
PS > wsl --status
The first command should install WSL2, download an Ubuntu distribution for it and ask for a restart.
The following commands are used to check the status, and if the WSL is still the default one, change it to WSL2.
More details on the installation procedure can be found here.
Once the WSL2 is set as default, proceed with the Docker Desktop installation.
2. Start Docker Desktop
When launching Docker Desktop for the first time, you should be prompted with a message informing you that it uses WSL2.
Using PowerShell, you can check that Docker and WSL2 are actually running in the background:
PS > Get-Process docker
Handles  NPM(K)    PM(K)      WS(K)     CPU(s)     Id  SI ProcessName
-------  ------    -----      -----     ------     --  -- -----------
    123      11    26084      25608       0.42  13960   1 docker

PS > Get-Process wsl
Handles  NPM(K)    PM(K)      WS(K)     CPU(s)     Id  SI ProcessName
-------  ------    -----      -----     ------     --  -- -----------
    146       8     1412       6848       0.05  14816   1 wsl
    146       7     1356       6696       0.02  15048   1 wsl
    145       7     1368       6704       0.02  15100   1 wsl
    145       7     1352       6716       0.14  15244   1 wsl
    146       7     1396       6876       0.02  16156   1 wsl
You should be able to see one docker process and several wsl processes.
3. Preparing DockerFile
Let us now prepare the installation, picking a destination folder and editing our Dockerfile:
PS > cd D:/
PS > mkdir install-geosx-docker
PS > cd install-geosx-docker/
PS > notepad.exe Dockerfile
Let us edit the Dockerfile, which is the declarative file for out container:
 1# Define you base image for build arguments
 2ARG IMG
 3ARG VERSION
 4ARG ORG
 5FROM ${ORG}/${IMG}:${VERSION}
 6
 7# Uninstall some packages, install others.
 8# I use those for clion, but VS code would have different requirements.
 9# Use yum's equivalent commands for centos/red-hat images.
10# Feel free to adapt.
11RUN apt-get update
12RUN apt-get remove --purge -y texlive graphviz
13RUN apt-get install --no-install-recommends -y openssh-server gdb rsync gdbserver ninja-build
14
15# You may need to define your time zone. This is a way to do it. Please adapt to your own needs.
16RUN ln -fs /usr/share/zoneinfo/America/Los_Angeles /etc/localtime && \
17    dpkg-reconfigure -f noninteractive tzdata
18
19# You will need cmake to build GEOSX.
20ARG CMAKE_VERSION=3.23.3
21RUN apt-get install -y --no-install-recommends curl ca-certificates && \
22    curl -fsSL https://cmake.org/files/v${CMAKE_VERSION%.[0-9]*}/cmake-${CMAKE_VERSION}-linux-x86_64.tar.gz | tar --directory=/usr/local --strip-components=1 -xzf - && \
23    apt-get purge --auto-remove -y curl ca-certificates
24RUN apt-get autoremove -y
25
26# You'll most likely need ssh/sshd too (e.g. CLion and VSCode allow remote dev through ssh).
27# This is the part where I configure sshd.
28
29# The default user is root. If you plan your docker instance to be a disposable environment,
30# with no sensitive information that a split between root and normal user could protect,
31# then this is a choice which can make sense. Make your own decision.
32RUN echo "PermitRootLogin prohibit-password" >> /etc/ssh/sshd_config
33RUN echo "PermitUserEnvironment yes" >> /etc/ssh/sshd_config
34RUN mkdir -p -m 700 /root/.ssh
35# Put your own public key here!
36RUN echo "ssh-rsa AAAAB... your public ssh key here ...EinP5Q== somebody@somewhere.org" > /root/.ssh/authorized_keys
37
38# Some important variables are provided through the environment.
39# You need to explicitly tell sshd to forward them.
40# Using these variables and not paths will let you adapt to different installation locations in different containers.
41# Feel free to adapt to your own convenience.
42RUN touch /root/.ssh/environment &&\
43    echo "CC=${CC}" >> /root/.ssh/environment &&\
44    echo "CXX=${CXX}" >> /root/.ssh/environment &&\
45    echo "MPICC=${MPICC}" >> /root/.ssh/environment &&\
46    echo "MPICXX=${MPICXX}" >> /root/.ssh/environment &&\
47    echo "MPIEXEC=${MPIEXEC}" >> /root/.ssh/environment &&\
48    echo "OMPI_CC=${CC}" >> /root/.ssh/environment &&\
49    echo "OMPI_CXX=${CXX}" >> /root/.ssh/environment &&\
50    echo "GEOS_TPL_DIR=${GEOS_TPL_DIR}" >> /root/.ssh/environment
51# If you decide to work as root in your container, you may consider adding
52# `OMPI_ALLOW_RUN_AS_ROOT=1` and `OMPI_ALLOW_RUN_AS_ROOT_CONFIRM=1`
53# to your environment. This will prevent you from adding the `--allow-run-as-root` option
54# when you run mpi. Of course, weigh the benefits and risks and make your own decision.
55
56# In case you want to use `sccache` (https://github.com/mozilla/sccache) to make your builds faster,
57# you may configure the `sccache` config file at your convenience.
58# Meanwhile, we provide here a simple local configuration.
59RUN mkdir -p ${HOME}/.config/sccache
60RUN printf '[cache.disk]\n\
61dir = "/tmp/.cache/sccache"\n\
62size = 3221225472 # 3GB\n' > ${HOME}/.config/sccache/config
63
64# Default ssh port 22 is exposed. For _development_ purposes,
65# it can be useful to expose other ports for remote tools.
66EXPOSE 22 11111 64010-64020
67# sshd's option -D prevents it from detaching and becoming a daemon.
68# Otherwise, sshd would not block the process and `docker run` would quit.
69RUN mkdir -p /run/sshd
70ENTRYPOINT ["/usr/sbin/sshd", "-D"]
This file enriches a base image already containing the GEOS’s TPL as well as extra utils, such as cmake and preparing for ssh connexion.
In the end, we will be able to run it in a detached mode, and connect to it to run and develop in GEOS.
There are two things you may have noticed reading through the Dockerfile :
It has environment variables to be passed to it to select the proper image to pull, namely
${ORG},${IMG}and${VERSION}, we’ll then have to declare them
PS> $env:VERSION='224-965'
PS> $env:IMG='ubuntu20.04-gcc9'
PS> $env:REMOTE_DEV_IMG="remote-dev-${env:IMG}"
Please note the preposition of env: in the windows formalisme. The ${ORG} variable will be hard-coded as geosx. The last variable will be use
as the image name. 224-965 refers to a specific version of the TPLs which may not be up to date. Please refer to Continuous Integration process for further info.
You’ll need to generate a ssh-key to be able to access the container without the need for defining a password. This can be done from the PowerShell,
PS > ssh-keygen.exe
PS > cat [path-to-gen-key]/[your-key].pub
The first command will prompt you with a message asking you to complete the desired path for the key as well as a passphrase, with confirmation. More details on ssh-key generation.
4. Build the image and run the container
The preliminary tasks are now done. Let us build the image that will be containerized.
PS> cd [path-to-dockerfile-folder]/
PS > docker build --build-arg ORG=geosx --build-arg IMG=${env:IMG} --build-arg VERSION=${env:VERSION} -t ${env:REMOTE_DEV_IMG}:${env:VERSION} -f Dockerfile .
As described above, we are passing our environment variables in the building stage, which offer the flexibility of changing the version or image by a simple redefinition.
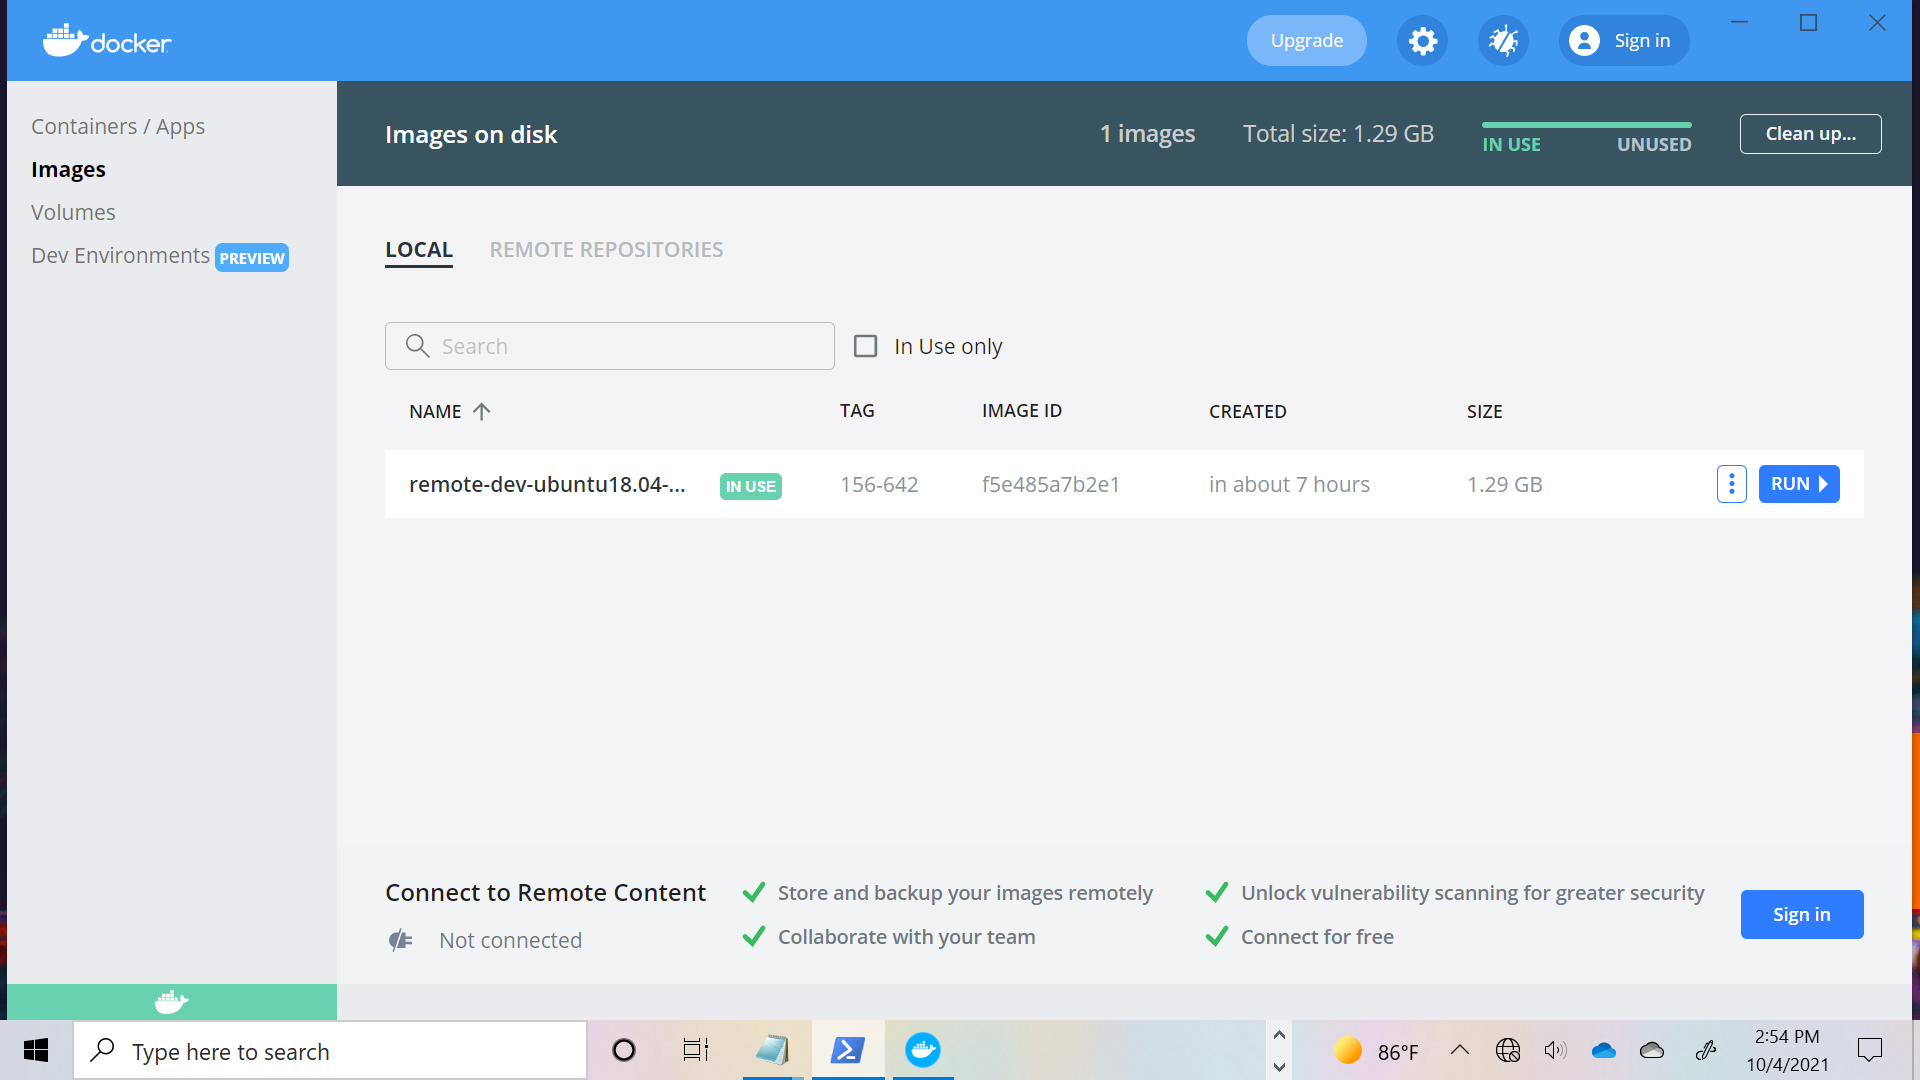
A log updating or pulling the different layers should be displayed afterwards and on the last line the image id. We can check that the image is created using PowerShell CLI:
PS > docker images
or using the Docker Desktop
Now that we have the image build, let us run a container from,
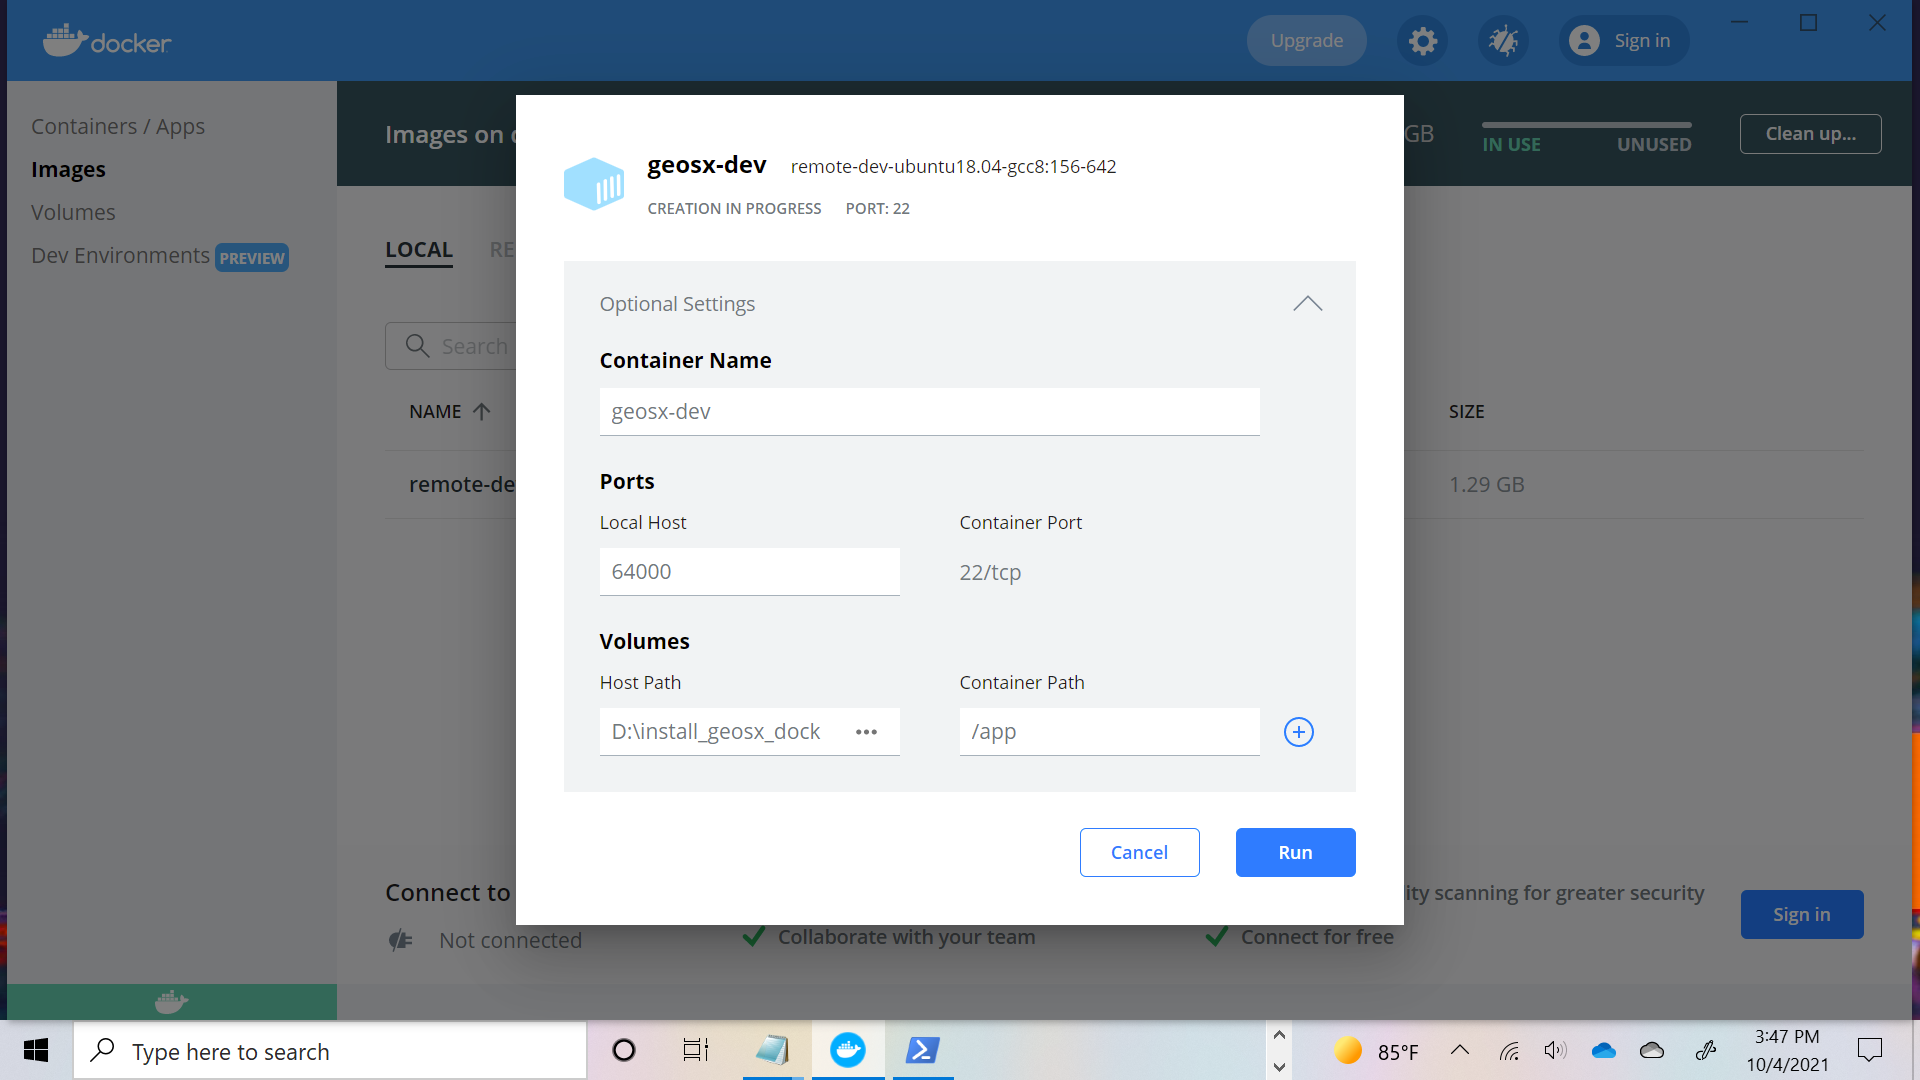
PS > docker run --cap-add=SYS_PTRACE -d --name ${env:REMOTE_DEV_IMG}-${env:VERSION} -p 64000:22 --mount 'type=bind,source=D:/install_geosx_docker/,target=/app' ${env:REMOTE_DEV_IMG}:${env:VERSION}
Note that in addition to the detached flag (-d) and the name tage (--name), we provide Docker with the port the container should be associated to
communicate with ssh port 22, as well as a binding between a host mount point (D:/install_geosx_docker/) and a container mount point (/app) to have a peristent storage
for our development/geosx builds. More details on the –mount options
A similar step can be achieved using the Docker Desktop GUI in the image tabs, clicking on the run button and filling the same information in the interface,
Coming back to our PowerShell terminal, we can check that our container is running and trying to ssh to it.
PS > docker ps -a
CONTAINER ID   IMAGE                                 COMMAND               CREATED                  STATUS          PORTS                                     NAMES
1efffac66c4c   remote-dev-ubuntu20.04-gcc9:224-965   "/usr/sbin/sshd -D"   Less than a second ago   Up 18 seconds   0.0.0.0:64000->22/tcp, :::64000->22/tcp   remote-dev-ubuntu20.04-gcc9-224-965

PS > ssh root@localhost -p 64000
Enter passphrase for key 'C:\***********/.ssh/id_rsa':
Welcome to Ubuntu 18.04.5 LTS (GNU/Linux 5.10.16.3-microsoft-standard-WSL2 x86_64)

 * Documentation:  https://help.ubuntu.com
 * Management:     https://landscape.canonical.com
 * Support:        https://ubuntu.com/advantage
This system has been minimized by removing packages and contents that are
not required on a system that users do not log into.

To restore this content, you can run the 'unminimize' command.

The programs included with the Ubuntu system are free software;
the exact distribution terms for each program are described in the
individual files in /usr/share/doc/*/copyright.

Ubuntu comes with ABSOLUTELY NO WARRANTY, to the extent permitted by
applicable law.

root@b105f9ead860:~# cd /app && ls
We are now logged into our container and can start Quick Start Guide.
Note
Note that :
You might be prompted that you miss certificates to clone, this can be resolved by installing ca-certificates and updating them
It might occur that git-lfs is missing then install it
PS > apt install ca-certificates && update-ca-certificates
PS > apt install git-lfs
From there you should be able to develop in your container or access it from an IDE, e.g. VSCode or MSVC19.
5. Running a case
Once the code is configured and compiled, let us check the status of the build,
root@b105f9ead860:~# cd [path-to-build]/ && ./bin/geosx --help
Trying to launch a case using mpirun, you might get the following warning
root@b105f9ead860:/tmp# mpirun -np 4 /app/code/GEOS/build-environment-debug/bin/geosx -i [geosx-case].xml -x 4 -y1 -z1
--------------------------------------------------------------------------
mpirun has detected an attempt to run as root.
Running at root is *strongly* discouraged as any mistake (e.g., in
defining TMPDIR) or bug can result in catastrophic damage to the OS
file system, leaving your system in an unusable state.

You can override this protection by adding the --allow-run-as-root
option to your cmd line. However, we reiterate our strong advice
against doing so - please do so at your own risk.
--------------------------------------------------------------------------
A possible workaround is to create a new user account and a run folder from this account
root@b105f9ead860:~# adduser runner
root@b105f9ead860:~# su runner
runner@b105f9ead860:/root$ mkdir -p /tmp/geosx && cd /tmp/geosx/
runner@b105f9ead860:/tmp/geosx$ cp [path-to-case]/[geosx-case].xml .
runner@b105f9ead860:/tmp/geosx$ ${MPIEXEC} -np 4 /app/code/GEOS/build-environment-debug/bin/geosx -i [geosx-case].xml -x 4 -y 1 -z 1